To list items on eBay, first go to In Queue under the eBay tab.
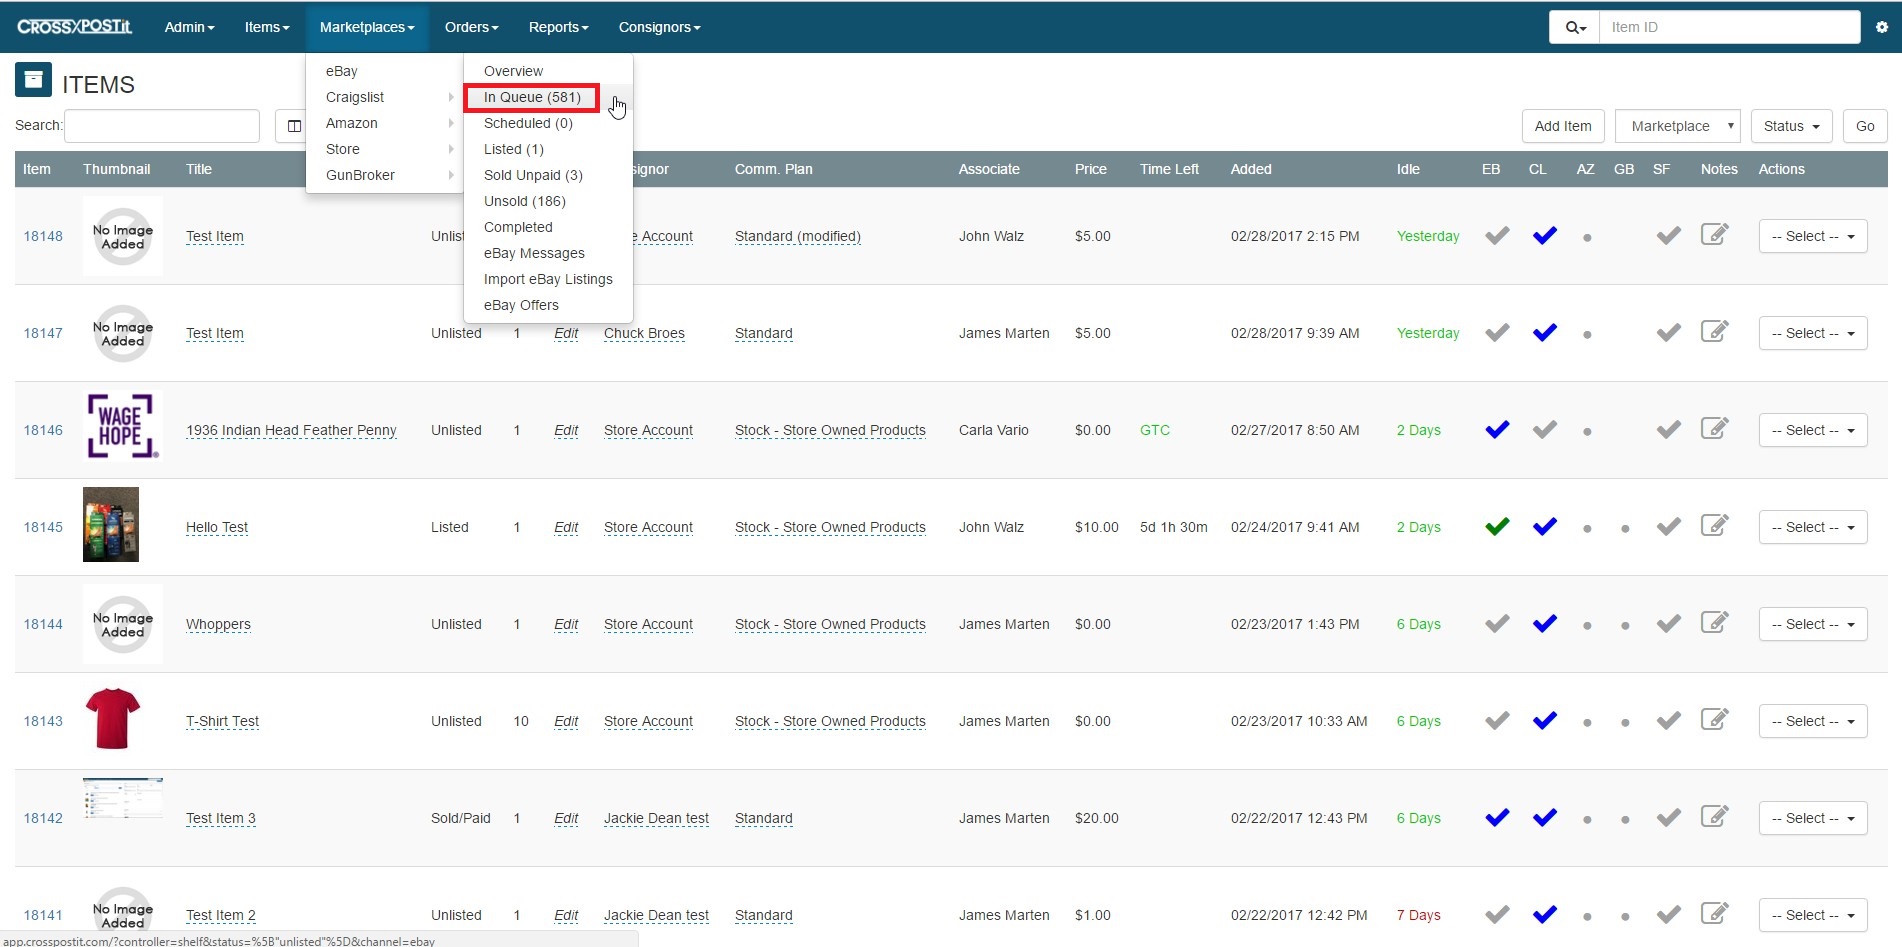
From In Queue, you can jump right to listing your item by clicking on –Select — and then clicking Prepare for eBay or click the item number which will land you on the Edit item page.
Step 1 – Auction Details
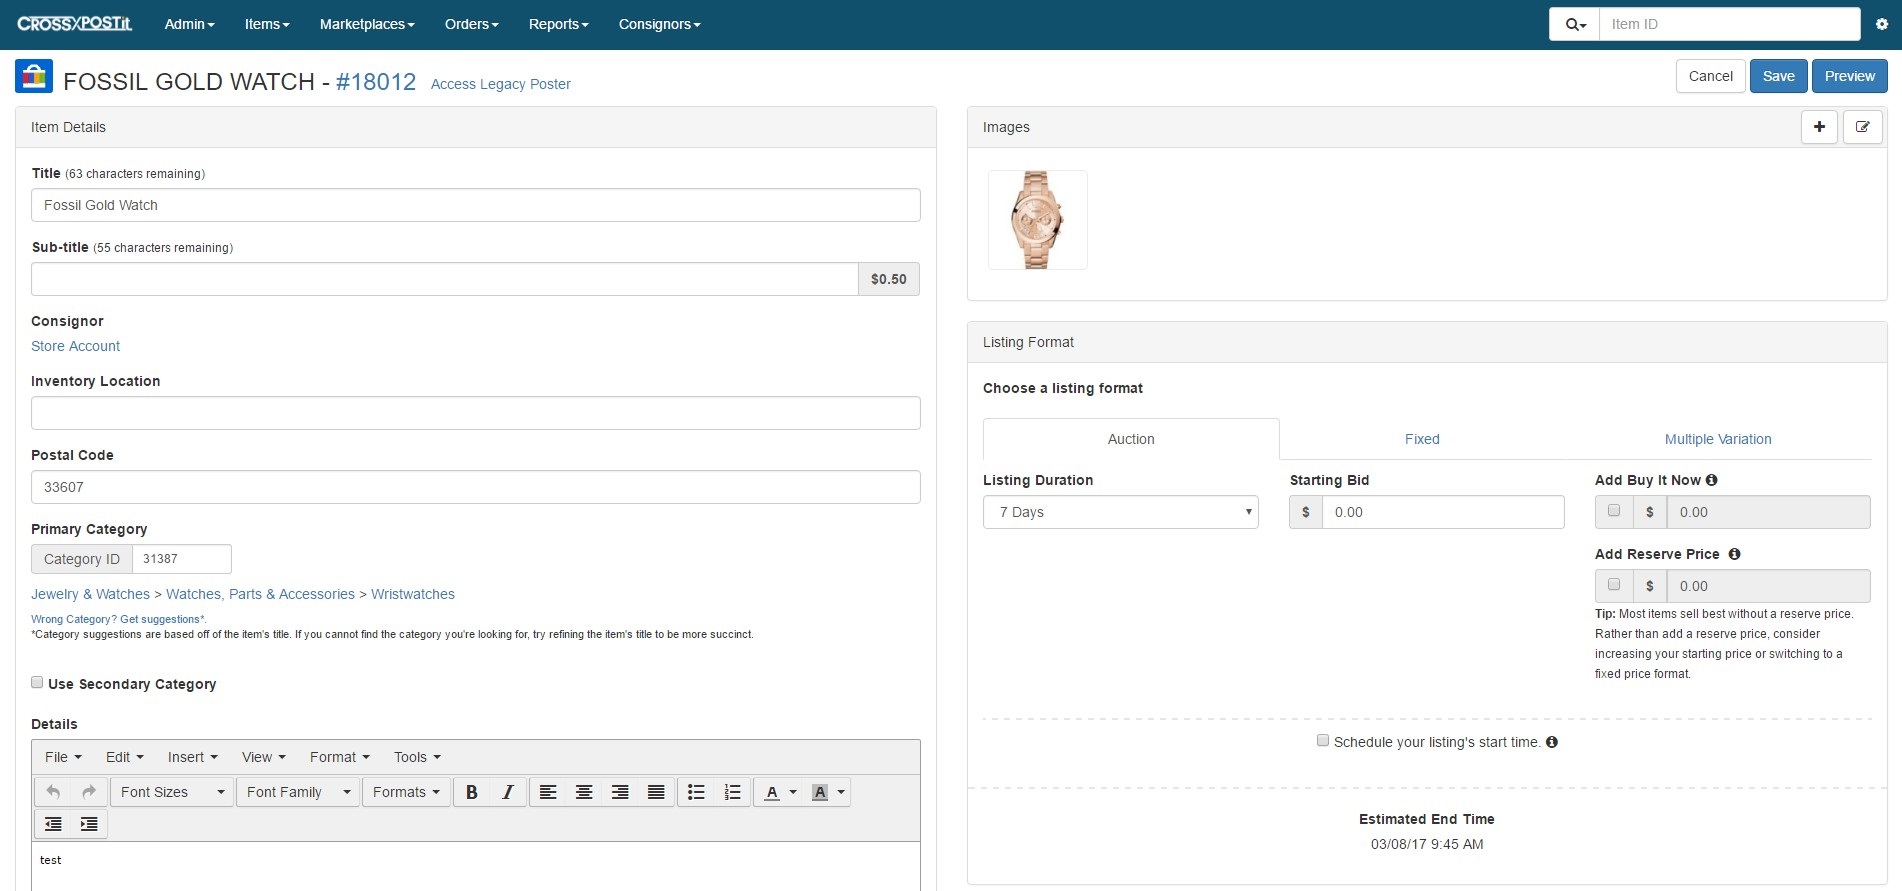
The first step is select the Listing Type: Auction, Fixed Price, Multiple Variation. This determines the information you’ll access throughout the listing process. The pricing will change and also the listing duration options change.
Title is the eBay Title. Subtitle is an unsearchable field on eBay that is an additional fee. The only use for this is to specify “Free Shipping!” or something that would be an additional eye-catching enticement to click.
Item Location is the shelf the item is located.
Item Postal Code is defaulted to your Settings > Location postal code. If you are drop-shipping or have multiple locations, you can choose where the item is located for updated calculated shipping and duration’s. Main Category is required, Second Category will double your eBay Listing Fees but puts you in 2 areas.
Duration changes based on Online Auction or the Fixed Price selection.
Start Time has 3 options:
- Start Listing when submitted is launching it live instantly.
- Schedule via eBay is beneficial if you want to preview the actual listing before it launches. Also, if you plan on listing high-end name brand items (and typically don’t list these types of items), you might want to consider using Schedule via eBay at least a day prior to launching. Why? eBay will hold your listing until someone verifies the authenticity of your listing. If you list live or schedule via CrossPostIt, eBay may take up your live time to verify the authenticity, reducing your 7-day to roughly 6-days live. *Keep in mind the time you’re selecting is Pacific Time.
- Schedule via CrossPostIt is great if you want items launched “after 6pm” kind of a mentality. Our scheduler queues up all items to be scheduled and starts launching them at the time selected. Therefore, you might have some items scheduled for 6pm but may list around 6:03pm. Scheduled listings usually only takes a few minutes. *Keep in mind the time you’re selecting is YOUR time zone.
Looking at the right side of this page, this will change depending on the listing style. If Fixed Price is selected, you’ll see Best Offer Auto Accept and Auto Deny. If they are set to 0, this means it will not perform anything automatically. If you set Auto Deny to $20 but didn’t set Auto Accept, it will only reject offers under $20 but not accept any.
Auto-Relist on Unsold is for those item you want relisted at the same price if it doesn’t sell.
Auction Counter and Auction Gallery are both add-ons from CrossPostIt to put at the bottom of your listings. The Auction Gallery shows various other items you’re selling.
Private Auction hides your bidders information during the listing.
If you wish to donate a portion of the sales to GivingWorks and you already have it active in your eBay account, you can select GivingWorks and select the charity to donate to.
Towards the bottom, there’s Item Details which is the description of the item.
Condition Description is a field for only used items. eBay takes this field and puts it close to the price at the top of the listing.
Employee Notes are internal use only and do not go in the listing.
Step 2 -Item Specific Details
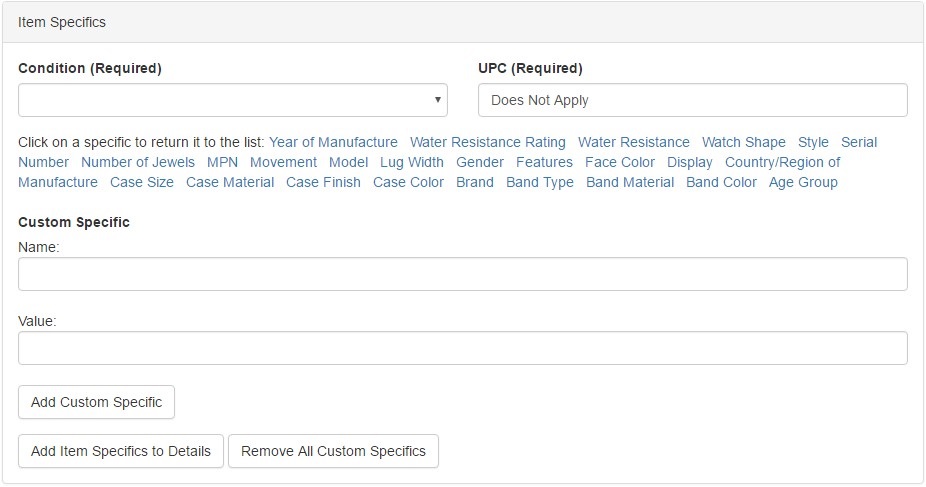 These options vary based on the category selected during Step 1. Required fields are indicated but it’s ideal to fill out the most specifics you can. If a brand, make, model, size isn’t on the list, you will have to select Custom because that is all that is available from eBay’s API.
Step 3 – Photos
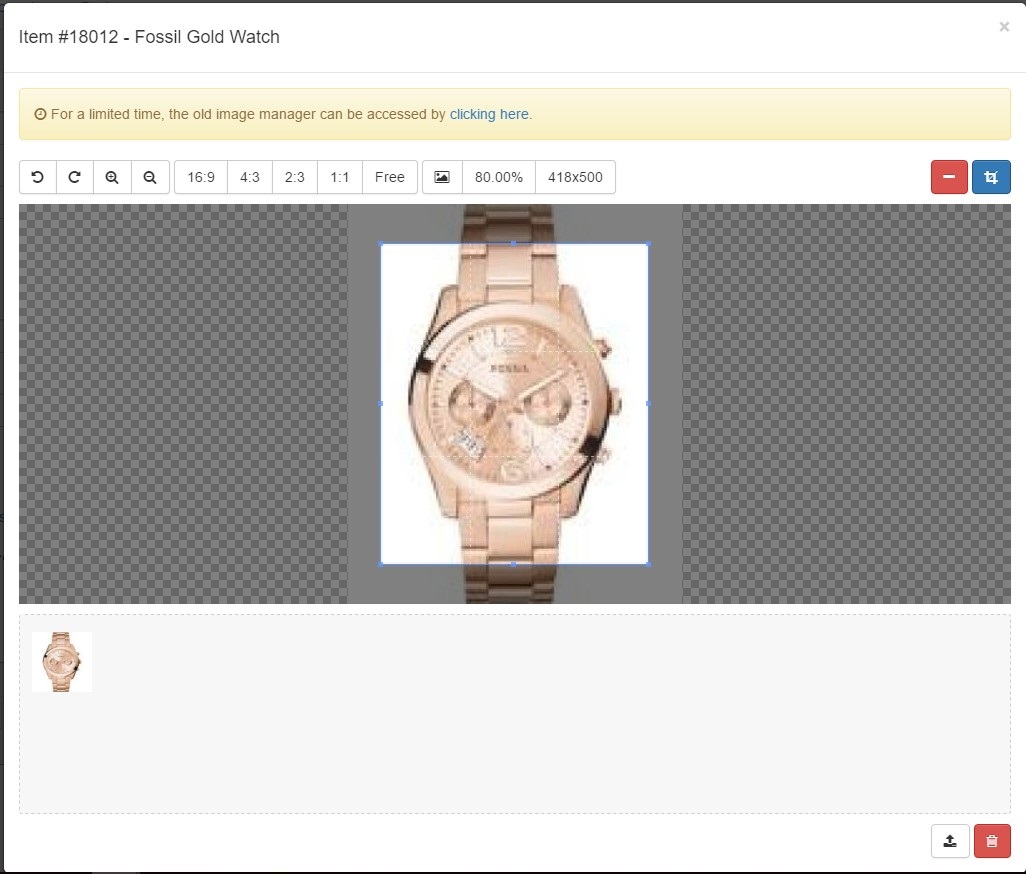
CrossPostIt has a built-in Photo Manager to assist with rotating, and cropping. To crop, move the corners first and then click the Crop button. Once finished editing and moving the images in the position you want them simply close the Photo Manager by clicking the “X” in the upper right hand corner which will save any changes made.
Note: The first image will be your Gallery photo.
Deleting Images:
If you need to delete one image click on the image to be deleted then click the red minus button on the top right. If you would like to delete ” all ” the images for this item click the red trash bin on the bottom right.
Adding Images:
To add an image click the Upload images button on the bottom right and either drag and drop your images in or click the center of the upload page and browse for your images. Hold the Ctrl key down to select more than one image, then click Open.
Step 4 – Variations
This will only show if your listing is a Multiple Variation Listing (MVL). This is covered on a separate training tutorial. If it’s not an MVL, your listing will skip from Step 3 to Step 5.
Step 5 – Shipping
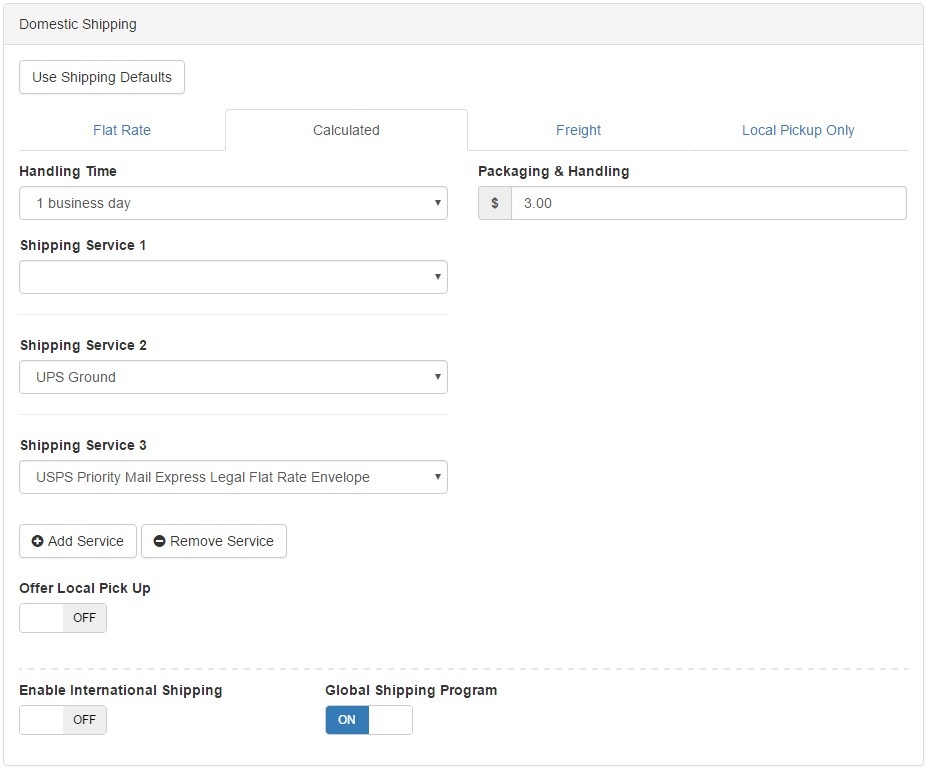
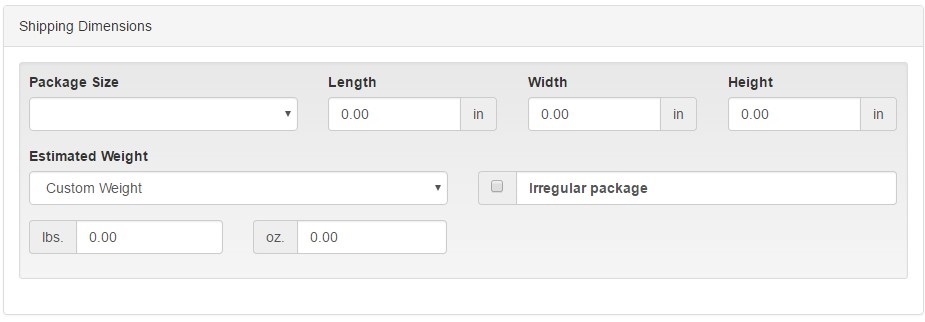
Most of this page can be setup in Settings (the gear icon) > Defaults where you only have to focus on the weight and dimensions. You can add up to 4 Domestic shipping options and 4 International shipping options per eBay’s allowance.
Outside of your defaults, you can choose a different Handling Time, select if you want the item to be in the Global Shipping Program (GSP), exclude certain countries from purchasing the item or adjust the return policy on this specific item.
Step 6 – Payments
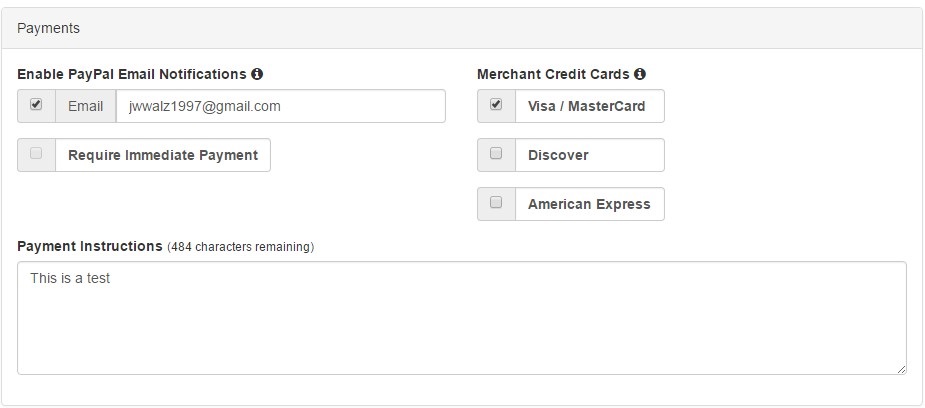
99% of the time these are all defaults and you won’t need to change anything. If you have different PayPal accounts, you can adjust this here. As a manager/owner, you can also lock this field down to be uneditable in Settings > Location. If the item meets the requirements for Immediate Payment, this option will be available.
Only accept Credit Cards if you have already verified your merchant account with eBay. If you do not have a verified merchant account and select credit card options, you will not be able to list until you deselect these options.
Step 7 – Preview
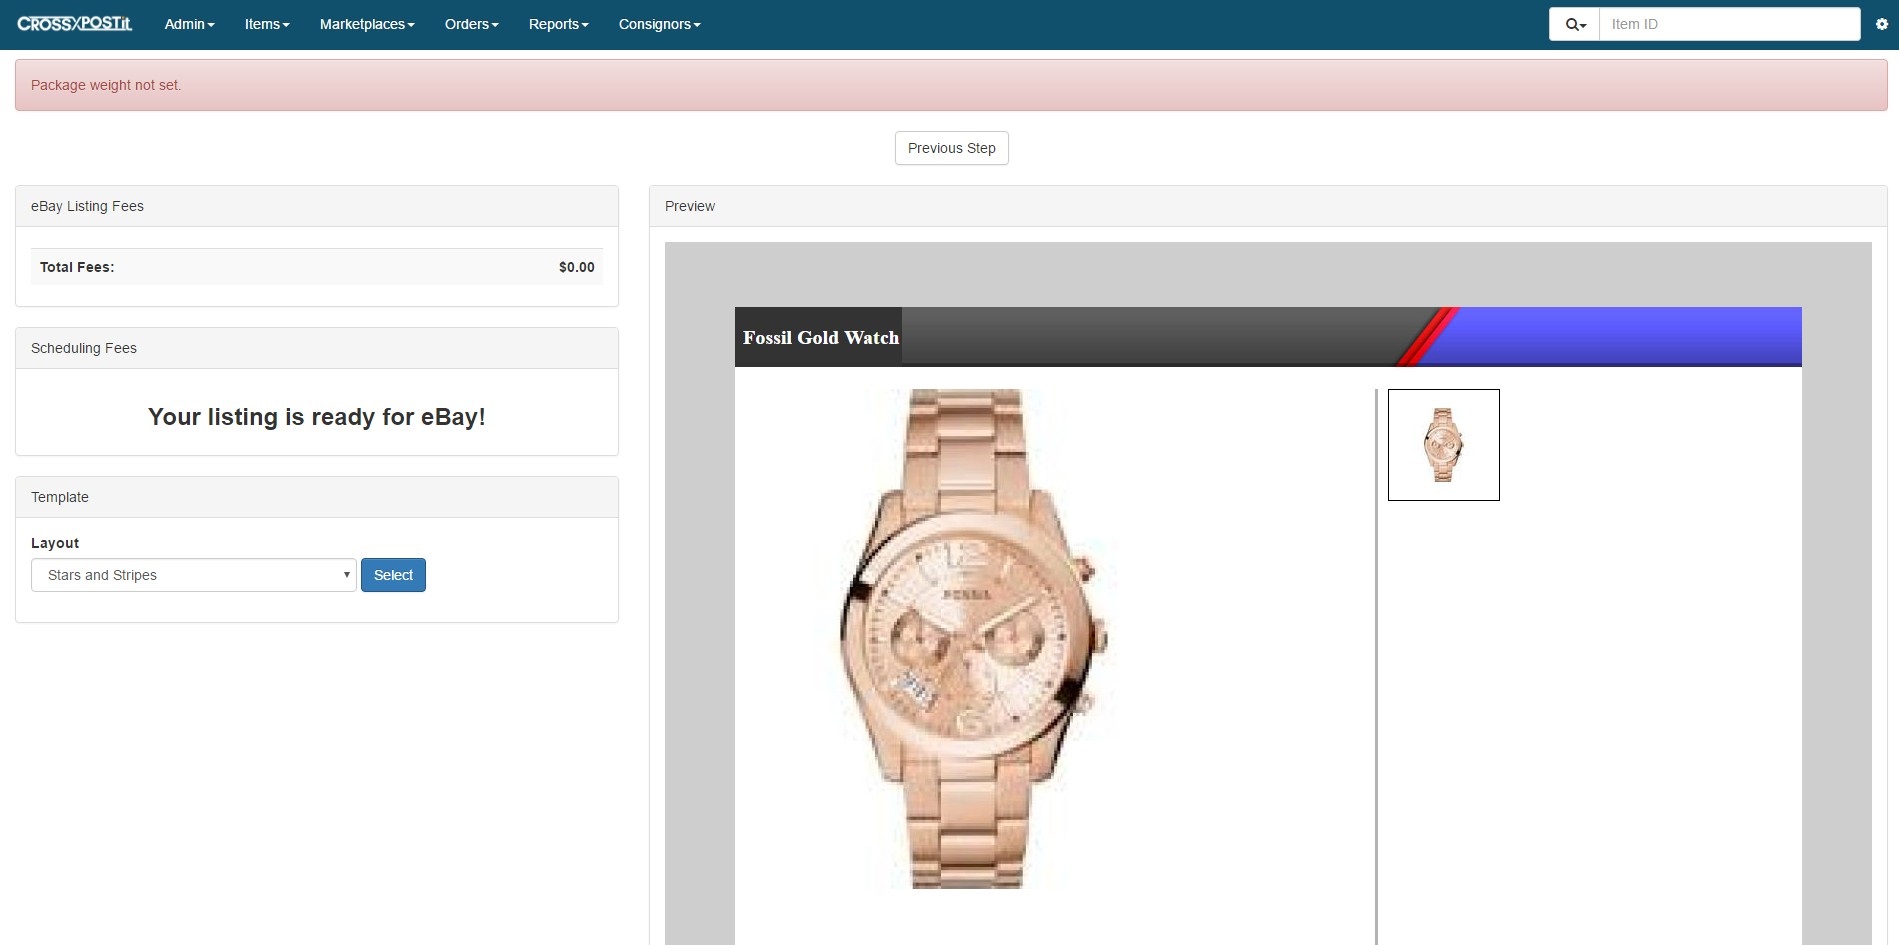
On Preview, if there is anything eBay feels is wrong or missing from your listing, it will display either an orange warning message (pictured) or a red error message. You can still list with warning messages but you are prevented from listing with error messages. Read the message and see what needs to be adjusted per eBay’s requirements.
By default, the listing layout chosen in Settings > Ad Templates is what is shown. You can select a different template and click Select to preview.
Look at what your listing will look like on eBay and choose Send Listing to eBay if it meets your standards.
*The eBay fees shown are not always exact. If eBay is running a promotion for free listings, they will not transmit those changes through their API so CrossPostIt wouldn’t know about the change of fees. Also, if your account has (let’s say) 50 free listings, those changes also won’t show here.
The important thing is when the item sells, eBay tells CrossPostIt how much fees were exactly. This way you can take the correct fees out of the payments to the consignor. Also, your reporting is correct.
You’ve successfully listed an item on eBay!